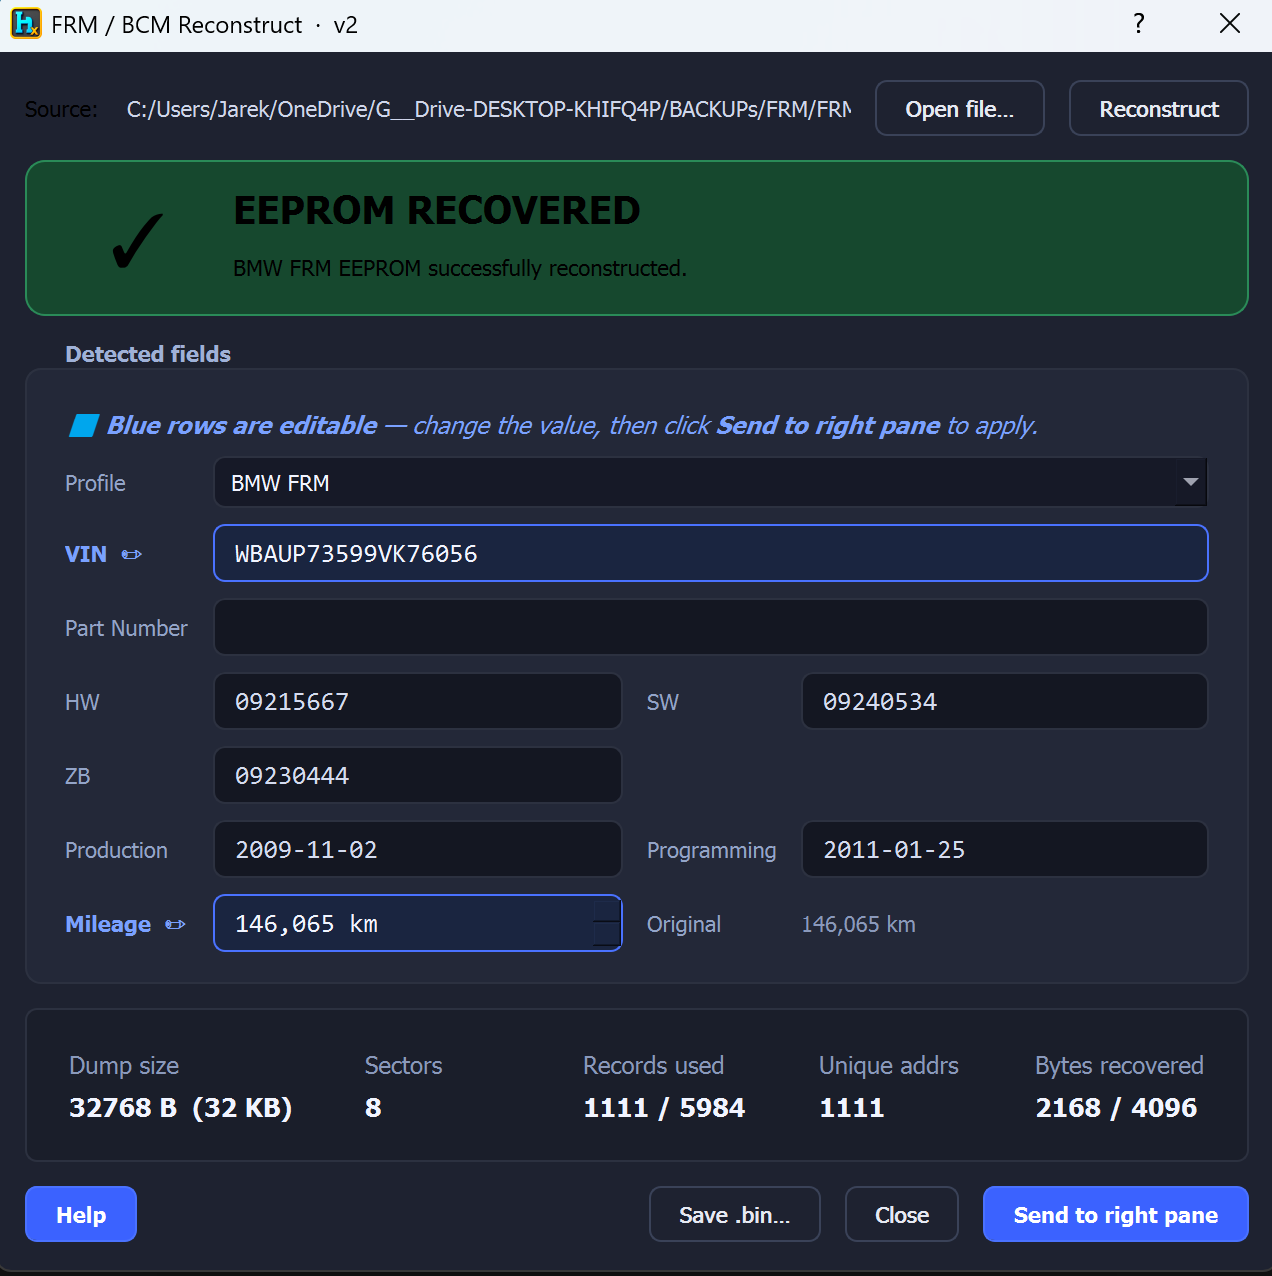
BMW FRM (footwell module) stores its EEPROM data as a journal of write-records inside the D-Flash (the EEE log). If the EEPROM partition itself becomes corrupted or unreadable, the original data usually still exists as history in that log. This tool replays every record in the EEE log and rebuilds ("reconstructs") a clean EEPROM image from it.
HexTool uses the same FRM / BCM Reconstruct tool for both BMW FRM and Jaguar XF/XJ BCM — only the size/scope of what gets recovered differs (see below); the recovery logic itself is identical.
How to open it
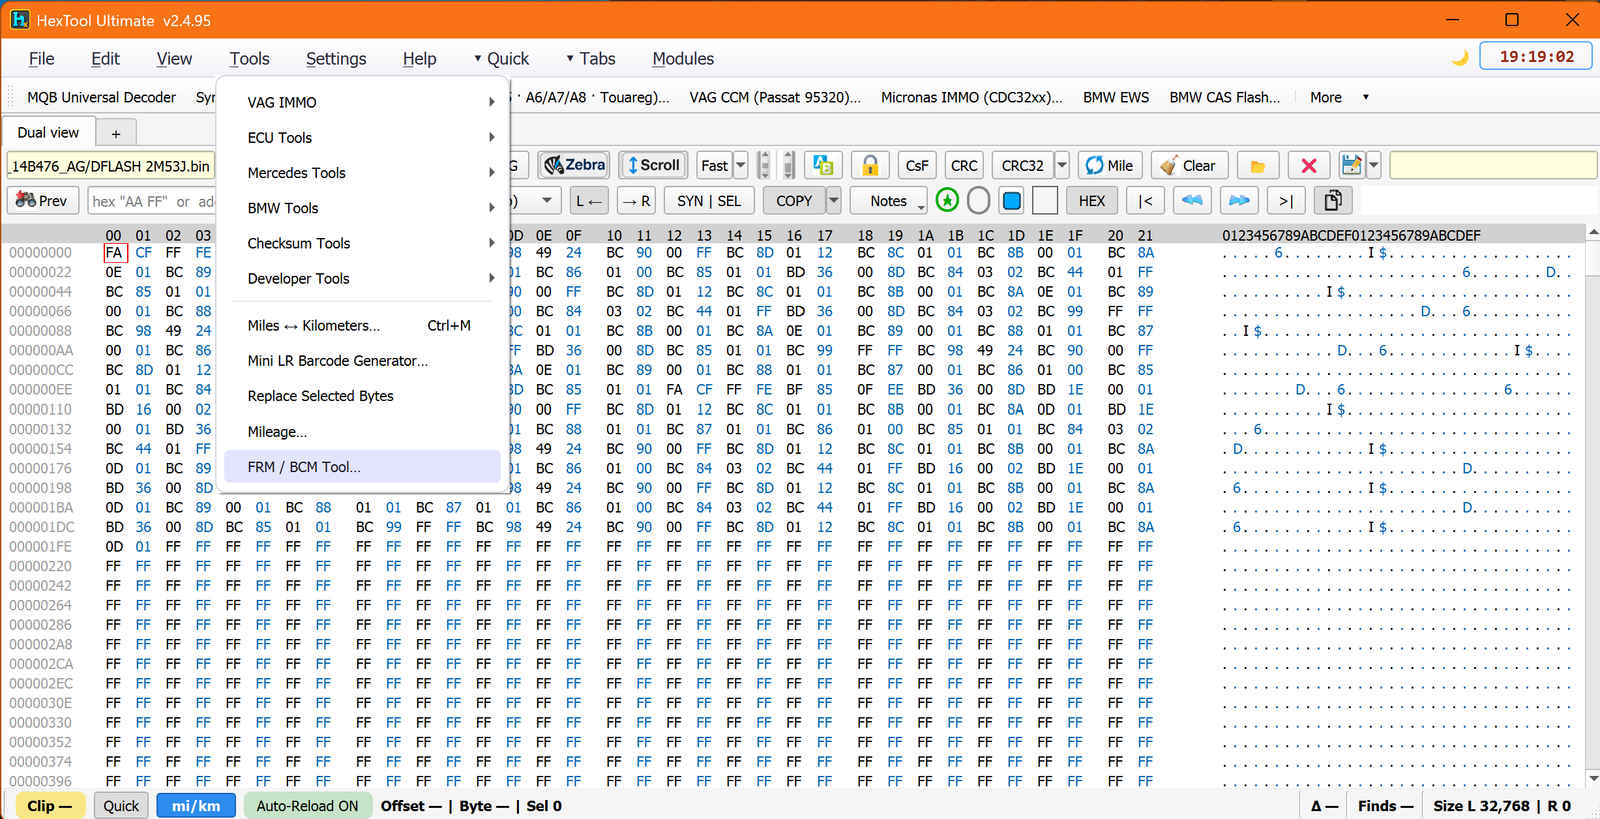
From the main HexTool window: Tools → FRM / BCM Tool…
When to use it
Only when the EEPROM partition is corrupted or unreadable but the D-Flash (16 KB or 32 KB) is still intact. If the EEPROM is healthy and readable, use it directly — this tool can't improve a working EEPROM, only rebuild a broken one from the D-Flash history.
What it recovers
BMW FRM → reconstructs the full 4 KB EEPROM image.
(Jaguar XF/XJ BCM, the other supported profile, only recovers the last 2 KB — see the Jaguar BCM guide for that profile's specifics.)
Normal workflow (D-Flash intact)
Read the full D-Flash (16 KB or 32 KB) from the module with your BDM programmer and load it in HexTool's left pane, or click Open file… in the tool.
Click Reconstruct — the tool replays the EEE log and fills the image.
Check the status banner: RECOVERED / PARTIAL / CORRUPTED.
Click Save .bin… to save the recovered EEPROM image.
Using your BDM programmer, create a new partition on the module: 4 KB EEPROM for BMW FRM, D-Flash 0 KB.
Write the recovered EEPROM file to the new partition.
Install the module in the car — that's it, no SDD/resynch step needed for BMW FRM.
Lost data completely? (no D-Flash, no EEPROM backup)
Get any known-good 4 KB EEPROM image from another BMW FRM module.
Click Load EEPROM… and open it.
The VIN field is editable — type the correct 17-character VIN for your car.
Click Save .bin…, then write it to a new partition with your BDM programmer (same 4 KB partition size as above).
Blue rows are editable — change the value, then click Send to right pane to apply it.
Requirements
A D-Flash dump (16 KB or 32 KB) from the module, read with a BDM programmer — or, if completely lost, any known-good EEPROM image from another BMW FRM module plus the correct VIN.
FRM / BCM / Jaguar XF/XJ BCM
FRM / BCM EEE Reconstruct — Jaguar XF/XJ BCM
Available in ProFullUltimate
Video walkthrough
What is this?
The Jaguar XF/XJ BCM (front & rear body control module) stores its EEPROM data as a journal of write-records inside the D-Flash (the EEE log). If the EEPROM partition itself becomes corrupted or unreadable, the original data usually still exists as history in that log. This tool replays every record in the EEE log and rebuilds ("reconstructs") a clean EEPROM image from it.
HexTool uses the same FRM / BCM Reconstruct tool for both Jaguar BCM and BMW FRM — only the size/scope of what gets recovered differs (see below); the recovery logic itself is identical.
How to open it
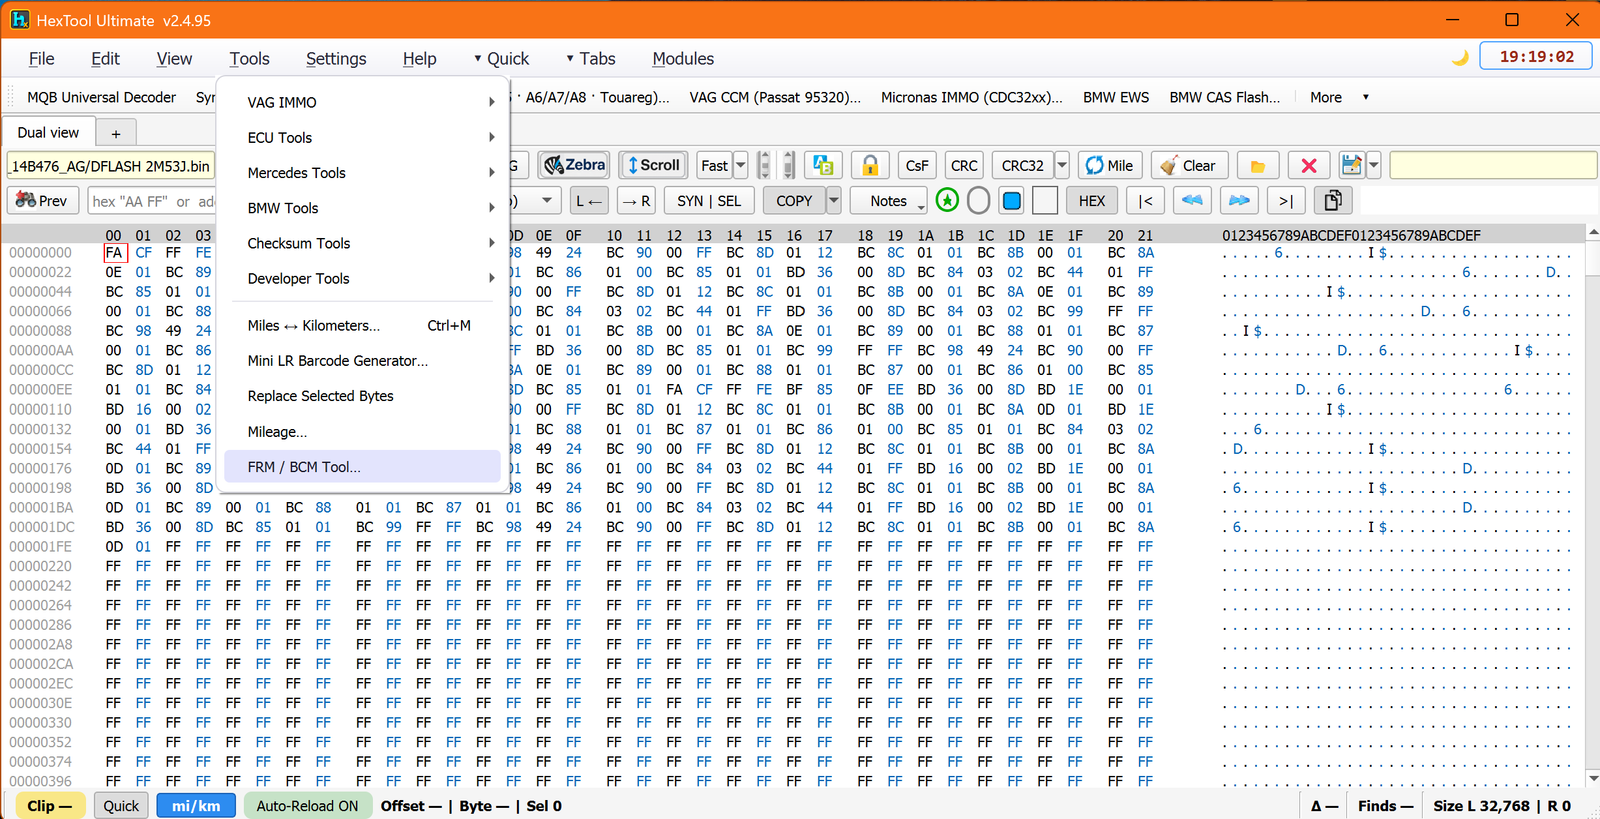
From the main HexTool window: Tools → FRM / BCM Tool…
When to use it
Only when the EEPROM partition is corrupted or unreadable but the D-Flash (16 KB or 32 KB) is still intact. If the EEPROM is healthy and readable, use it directly — this tool can't improve a working EEPROM, only rebuild a broken one from the D-Flash history.
What it recovers
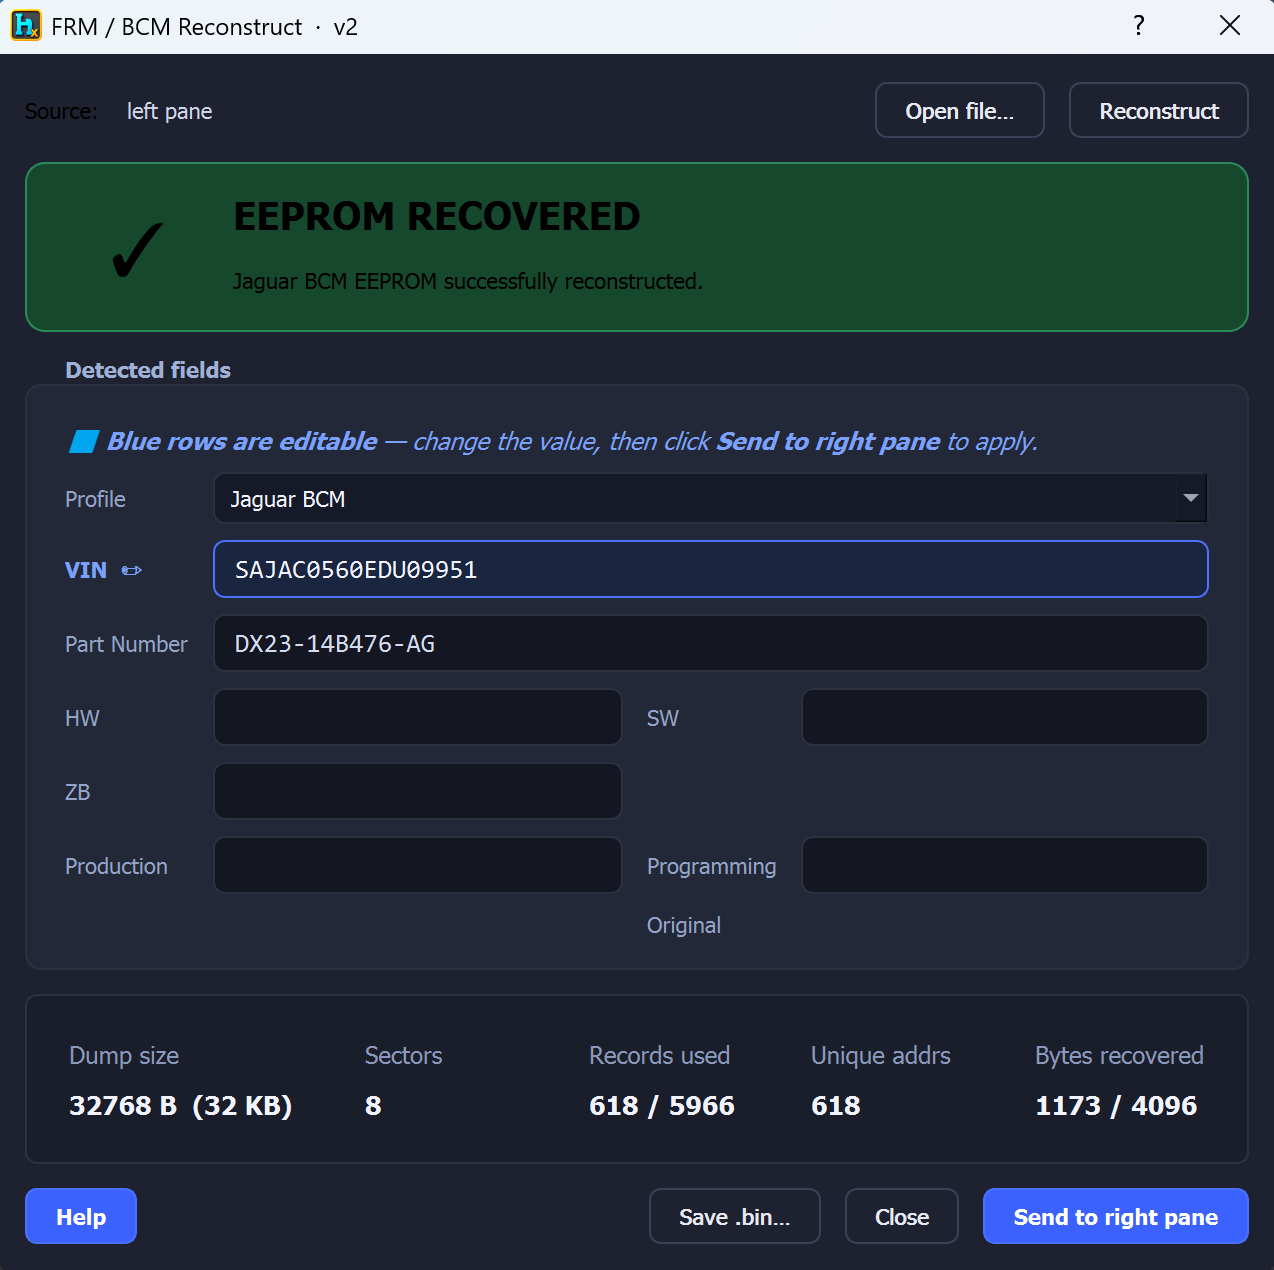
Jaguar XF / XJ BCM → reconstructs only the last 2 KB of the EEE image (the module's EEPROM partition is 2 KB, smaller than BMW FRM's 4 KB).
(BMW FRM, the other supported profile, recovers the full 4 KB — see the BMW FRM guide for that profile's specifics.)
Normal workflow (D-Flash intact)
Read the full D-Flash (16 KB or 32 KB) from the module with your BDM programmer and load it in HexTool's left pane, or click Open file… in the tool.
Click Reconstruct — the tool replays the EEE log and fills the image.
Check the status banner: RECOVERED / PARTIAL / CORRUPTED.
Click Save .bin… to save the recovered EEPROM image.
Using your BDM programmer, create a new partition on the module: 2 KB EEPROM for Jaguar BCM, D-Flash 0 KB.
Write the recovered EEPROM file to the new partition.
Install the module in the car, then resynch it with SDD — unlike BMW FRM, Jaguar BCM needs this extra step to re-pair/correct the remaining module-specific data on first start-up.
Lost data completely? (no D-Flash, no EEPROM backup)
Get any known-good 2 KB EEPROM image from another Jaguar BCM module.
Click Load EEPROM… and open it.
The VIN field is editable — type the correct 17-character VIN for your car.
Click Save .bin…, then write it to a new partition with your BDM programmer (same 2 KB partition size as above).
Install in the car and resynch with SDD — it will correct the remaining module-specific data on first start-up.
Detected fields
Profile (Jaguar BCM / BMW FRM)
VIN (editable)
Part Number (HW/SW/ZB may be blank on this profile — not all fields apply to every module type)
Blue rows are editable — change the value, then click Send to right pane to apply it.
Requirements
A D-Flash dump (16 KB or 32 KB) from the module, read with a BDM programmer — or, if completely lost, any known-good EEPROM image from another Jaguar BCM module plus the correct VIN.
🛠️
Coming soon
This guide is being written and will be published here soon. Check back shortly — documentation is added regularly.